
Double clicking on any object on the QSAS Working List will launch a browser which allows the user to view and edit (change, delete or create) data and metadata. Highlighting an object on the working list and selecting Edit Object from the right button menu or Edit menu on the Main Window will also launch the edit browser for that object.
Each data type has its own specific browser, and the appropriate browser will be launched for the object selected. The browsers display a list of any cross references attached to the object (such as attributes) and double clicking an item in this list will in turn launch the appropriate browser for it. Metadata are stored as dvos data objects and the same object types are available for attributes as for data.
On launch a copy of the data object is made and it is this new object that is edited. The object will be saved with whatever name is selected in the name field, and will overwrite an object with the same name (thus allowing changes to be made to an existing object).
The data and all metadata are copied to the new object. The name of an object may be changed at any time using the Re-Name Object item in the Edit menu or right button menu on the QSAS Main Window.
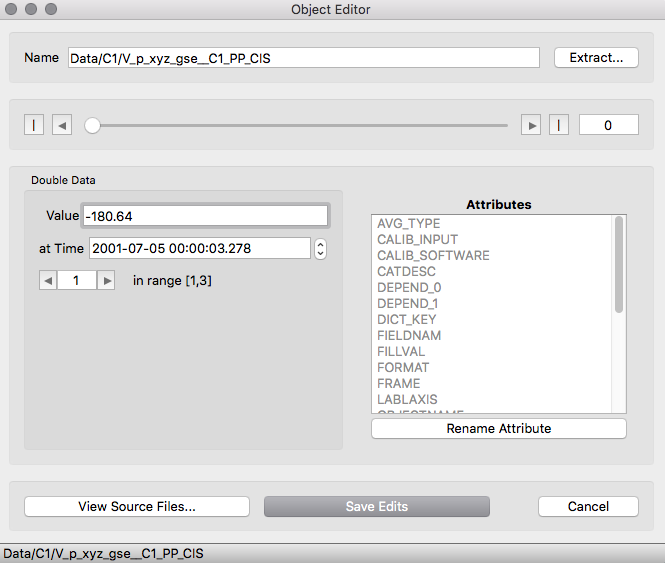
The Extract button next to the name field launches a window which permits a sub-sample or component selection of the object to be saved directly to the working list. This has the same effect as selecting Subsample/Extract item from the Analysis menu.
For data series objects there will be a field showing the currently displayed record - this may be changed by typing in the field or by using the arrows or the slider. The centre panel will differ for each data type, but a single current value is always shown for the selected element. In the example above of a vector time series the value field is accompanied by a field showing the time tag for that value and an index display which shows the currently selected component in the vector. This may be changed by typing directly in the component field or using the arrows either side. Objects with higher dimensionality will have index counters for each dimension in the data object.
It is not possible to increment any indices beyond the valid range for the object.
Dragging an attribute (or any other cross reference such as cached component) from the Attributes list to the Working List
makes it into a new object on the Working List. Alternatively, double
clicking a name in the attribute list brings up a new editor for it, and
it can be edited in the
same way as the Working List object it belongs to. Changes, when saved,
apply to the copy of the parent object which must also be saved to
affect the Working List object
The Rename Attribute button allows just the attribute name to be changed without launching the editor (which would create a new attribute with the selected new name).
The View Source Files button will launch a dialogue showing all the data files that held the input data - for direct import this is a single file, for the data selector this may be a list of files which were concatenated, and for an object produced internally in qsas this will be empty. When a file name is selected from the list, QSAS will attempt to open it with the direct import browser to allow browsing of the global attributes in the file. Global attributes are not loaded into QSAS with the data and are not available internally. If fill values are stripped from an imported object this file browse facility can also be used to compare the data within QSAS with the data in the file. Note that if Fill values are stripped then all arrays with any fill values will be rejected, and in some products this can mean that all records are rejected. Stripping of Fill values can be turned on/off with the toggle on the QSAS Main Window.
The New Metadata item in the edit menu will launch a selection dialogue to choose the data type of the new metadata object, and this in turn launches an empty editor of the appropriate type. Time tags may similarly be added to some objects using the Add time tags button.
The Delete Metadata item in the edit menu will delete the selected metadata from the object.
The Attach Metadata item in the edit menu will bring up a window allowing the user to drop an object from the Working List and give it a name to be used as a new attribute for the object. Objects are not allowed to take themselves as attributes, and this will be blocked. Dragging an object from the Working List to the attribute list attaches it as a new attribute with a default name of "NewAttribute".
Time Intervals have their own specific time interval editor which is described separately.
Page created by Tony Allen, csc-support-dl@imperial.ac.uk
Last up-dated: October 2016 Tony Allen